Pages

Sunday, 17 November 2013

New eBook - a Failsafe Christmas


Christmas Time - Let's enjoy our Food

FS Christmas cover


This eBook has the makings for a great Christmas meal as well as special treats for the children... All recipes are free from gluten, dairy, egg, nut, soy, corn. Suitable for RPAH Elimination and Failsafe diets.

eBook is only $5.95

See BOOKS for more information and a recipe index

New eBook - the grain free school lunch box

A collection of coconut flour recipes for the school lunch box


grain free lunchbox cover


A simple collection of grain free baking to help you pack something healthy and healing in your child's lunchbox. Everything is free from gluten, grains, refined sugar and nuts. Most are dairy free and some free of eggs.

These recipes are not suitable for RPAH Elimination and Failsafe diet.

eBook is only $5.95

See the BOOKS tab for more information and a recipe index


Sunday, 27 October 2013

Crunchy Coconut Cookies

Grain Free, Nut Free, Egg Free Coconut Cookie

perfect for Lunchboxes


the crunchy coconut cookies

Ingredients


2T coconut flour
30g coconut sugar
90g tapioca starch
50g coconut oil
30g rice malt syrup
1t vanilla extract
1/2t bicarb soda

Method


Blitz the coconut sugar in Thermomix until fine, 130 seconds, speed 10
Add remaining ingredients and combine, 30 seconds speed 4
Scrape down well and repeat
The mix will not come together in a ball, but look like moist bread crumbs
(do not be tempted to add more moisture)
Tip out into a bowl and using your hands bring the dough together into a ball
Carefully press small tsp size balls into discs using the palm of your hands
(The mix will fall apart if you try to roll into balls in your hands)


how to roll crunchy coconut cookies

Place onto a lined baking tray
Bake for 10 minutes 180 degrees celcius
Remove from the oven briefly and flatten carefully using baking paper and MC

how to press crunchy coconut cookies
1. Cookies ready for oven 2. Cookies partially baked
3. Cover with baking paper and carefully press using MC
4. Pressed Cookies now ready to finish baking


Return to the oven for a final 5-10 minutes until golden
Cool on trays
Cookies will be soft when warm and will harden upon cooling

crunchy coconut cookies - finished no pressing
If you do not want to press your cookies mid baking,
they will still work perfectly fine, just be a little puffy like this

crunchy coconut cookies pressed
Pressed cookies - the crunchy texture is really delicious with the thinner pressed cookie


Store in an airtight container in the pantry

Notes:


Recipe Abbreviations
 
A double quantity fits in the Thermomix bowl easily

If you prefer to replace the Rice Syrup with an alternative sweetener, use a liquid like maple syrup or honey


Too Crunchy?


If you would like a less crunchy cookie,
use ghee instead of coconut oil - you can use all ghee or half ghee/half coconut oil
use baking powder instead of bicarb soda


Other uses:

The mix would make a great crumble topping for fruit or a base for cheesecake or chocolate tart or sandwich between marshmallow


Tuesday, 22 October 2013

Bulk Ordering

Sort of a CO-OP

 
I am able to purchase many items at bulk prices and would like to share these savings with you... so I am sort of starting a CO-OP... I will be doing quarterly orders of products and you will be able to order goods of your choice, which you will then need to pick up from me in Peakhurst, Sydney. Apologies I am not able to offer postage at this stage.
 
There are all sorts of grains, flours, baking aids etc... suitable for grain free folk and those on RPAH Elimination / Failsafe Diet.
 
Please check out the list and see if you would like to join me, then email for an order form.

Product List


Celtic Salt Fine 5kg
Himalayan Salt Super Fine 5kg
Nut Milk Bag
Organic 100% Vanilla Powder 100g
Organic Amaranth 5kg
Organic Amaranth flour 5kg
Organic Apple Cider Vinegar 5L
Organic Black Chia Seeds 1kg
Organic Brown Linseed 5kg
Organic Brown Rice Flour 5kg
Organic Buckwheat flour 5kg
Organic Buckwheat hulled 1kg
Organic Cacao Powder Raw 350g
Organic Coconut Butter 340g
Organic Desiccated Fine 5kg
Organic Coconut Flakes 2.5kg
Organic Coconut Flour 5kg
Organic Coconut Oil Deodorised 5L
Organic Coconut Sugar 1kg
Organic Coconut Syrup 1L
Organic Golden Linseed 5kg
Organic Hulled Sesame Seeds 5kg
Organic Millet flour 5kg
Organic Millet hulled 5kg
Organic Pepitas 5kg
Organic Psyllium Husks 200g
Organic Quinoa 1kg
Organic Rolled/Flaked Quinoa 2.5kg
Organic Sorghum flour 5kg
Organic Sunflower Seed kernels 5kg
Organic Tricolour Quinoa 5kg
Organic Vanilla beans 100g
Organic Virgin Coconut oil raw 5L

These products will only be ordered every six months:

Guar Gum 1kg
Organic Raw Honey 1kg
White Rice Flour 5kg


NOTE: Quantities are bulk and will come packed as it is supplied to me


Some procedure policies:

 
Orders will only be processed when received on an Order Form
Orders must be received by the deadline for that period, no late orders can be accepted
Orders must be paid for when ordering by direct deposit
If monies are not received your order will not be processed
There will be a $5 handling fee per order to help cover the freight
Once your order has been processed it cannot be cancelled and refunds are not available
If any items ordered are unavailable or out of stock, monies will be refunded

Please note this is not a profitable exercise for my business, this is just an opportunity to help you source bulk ingredients.


We will see how this process runs this quarter and make any modifications to improve the process next time. In the future we may be able to add more products to this as they become available. If there is something you are unable to source yourself and would like me to look into adding to the list, please let me know.


FIRST ORDER

 
This order will be done on Wednesday 6 November 2013
Please get your orders emailed and payments done by Friday 1 November 2013


Sunday, 20 October 2013

Dairy Free Ice Cream

Amazing easy to scoop straight from the freezer

ice cream


This ice cream is delicious and will scoop straight from the freezer... it can be flavoured too.

The recipe can be found in my cookbooks (check the Index to see which book suits your family best). It is very simple, based on rice milk. It is refined sugar free, using rice malt syrup. You can also use maple syrup. If you don't tolerate rice, try it with quinoa milk, nut milk etc.


I usually mix mine in the Thermomix and then churn in an ice cream machine. My ice cream machine broke (just in time for summer!) and so I had to go back to the old way... mix, then leave in the freezer in a metal bowl for a few hours to set... then whip with a spoon and put in Tupperware.

The problem being that although this is very easy simple way to do it, and the ice cream still tastes amazing... it is not as light and fluffy as a churned ice cream. I thought I would see if the Thermomix could whip it up so it was lighter like it was when made in the ice cream machine. Happy to say, indeed it can, and in only 15 seconds! NICE!!

So for those of you using a Thermomix and not wanting to get another gadget...

Follow the method as per the recipe book...
Freeze in a metal bowl for a few hours (takes 4 hours in mine to set)
then
Pop the frozen mass into your Thermomix bowl
Whip 15 seconds, speed 6

It will be light and fluffy, just perfect!
Place in it's usual Tupperware container in the freezer to complete setting (another 2 hours)

If you want to eat it straight away, it will be soft serve consistency.

Want to make ice blocks?


Once whipped, scoop the ice cream into moulds, insert the sticks and freeze until set overnight... remove and wrap in small plastic bags and store in the freezer.

Flavouring


Coffee
This is delicious with a tablespoon of instant coffee added when initially mixing (decaf for failsafers)

Fruit Ripple
When you have whipped in Thermomix, place in it's container, then stir gently through 1 tablespoon of fruit jam, use a palette knife to stir so that you see swirls of colour (pear or choko jam for failsafers)

Caramel Crunch
Once whipped, place in it's container and stir through some chopped up honeycomb (available from Allergy Train) and Caramel Sauce

Chocolate
Add 1 tablespoon of cocoa, raw cacao or carob to the mix initially


Want to take ice cream to the next level and make it part of your healing foods... Make some rice milk kefir (which is a fermented drink full of probiotics), simply replace the rice milk in the recipe for the rice milk kefir... Gives the icecream a lovely tang! For the recipe see the Failsafe to Healing Workbook


enjoy!


signature


Wednesday, 2 October 2013

Fruit Ice Blocks

Simple easy iceblocks made from fruit


fruit iceblocks


Ingredients

This quantity will make approx. 4-5 zipzicles

2/3 cup coconut water
2/3 cup water
2/3 cup fruit (fresh or frozen)


flavour suggestions: strawberry, kiwifruit, raspberry, mango, blueberry, pear


Method


Put all ingredients in Thermomix
Blend 20 seconds speed 6

If using Zipzicles... use a turkey baster to help fill the bags easily, then seal


use turkey baster to draw up the liquid and easily place in the zipzicle bag


or pour into iceblock moulds

Place in the freezer to set overnight and then enjoy!

Zipzicles are available from Lime Tree Kids
http://www.limetreekids.com.au/category-zipzicles-zip-top-ice-block-pack-528.aspx


TIP for Failsafers : Use pear only and replace the coconut water with normal water
or the liquid from the tinned pears

Friday, 13 September 2013

Homeopathy

the amazing world of Aperture Homeopathy


Diet and Aperture Homeopathy has been part of our journey and for most, you know how I have worked through diet to heal. Homeopathy is new and strange for some and I am often asked how and why I use it; what is it like; what are the benefits; criticised because it isn't scientific and questioned about how do I know it works...


I wanted to put together some information for those progressing through their healing journey with themselves and their children. I am not a doctor, a medical professional or a homeopath... I am a mother who has investigated and studied and made decisions for my family. You need to decide for yourself the path for your family. This information is just my experiences.

I have been on this journey for 18 years... the last 7 years has been intense. We have moved through so many different twists and turns. I am excited by the current change to our path as we have seen the most positive gain so far in our journey.


family photo

DIET... is it enough?


Please read all about how we introduced healing foods very slowly.
http://www.kerstenskitchen.com.au/2012/12/our-story-to-healing.html
http://www.kerstenskitchen.com.au/2013/01/childrens-journey.html
http://www.kerstenskitchen.com.au/2013/08/update-childrens-healing-journey-six.html

This took time and patience and was full of frustrations. I found we got to the point where we got stuck... I couldn't find a way forward. Tolerance was not increasing anymore, even though we were using Biomedicine to help us. The children were doing well. They had increased their foods from 5 to 12. And that is awesome... but I wanted more. I desperately wanted them to have a healthy diet, be able to eat all vegetables and fruits... be able to make them all these lovely GAPS and Paleo treats I was enjoying. I also had some issues with my health that were not resolving with biomedicine. I heard about the Dhanvantari College of Homeopathy from a Failsafe friend on the Facebook groups. I could see how well her children were going and I was curious.


Our journey with homeopathy


As a Christian, I initially needed to make sure this therapy would not go against my faith. After discussing this with the homeopath, and earnestly praying, I could see it would be fine. And so I took the plunge and started remedies for myself. I didn't understand the process of detox and found my emotions difficult to cope with. It took quite some time for me to realise that the way the toxins leave the body and the emotions that come to the surface, move through quickly and easily if you are calm and let go. It is not a pleasant time if you fight it.

The other thing that was so different from my previous path was trusting my homeopath to do her best for me. In Biomedicine, we are so busying researching and trying to find the answers... Homeopathy is very different. We have to let all of that go and let the homeopath find our healing path. It is strange and foreign and hard to understand... I have no idea what we take each month, I just follow her instructions.

Once I had dealt with my initial panicked reaction, I calmed and started to enjoy the process. I then decided to start the children. When I realised they were stuck and I was unable to increase their food tolerance just by introducing small amounts slowly, I had to make a change to their path. They coped much better than I did initially and embraced this new change.

Within a month we had stopped all our biomedicine treatments and supplements and relied solely on homeopathy. The results have been nothing short of amazing!


The Gains


The positive outcomes make all the detox so very worth it. For my son, who has Sensory Processing Disorder, his gains have shined. He was a very anxious boy, who barely spoke, had no fine motor skills, was unable to tolerate noise or crowds and had massive separation anxiety.

Increasing his zinc through biomedicine had a positive impact on his anxiety. He was able to separate and go to preschool. However he still clung to me when I left him (although no longer crying) and when I returned, was standing at the door waiting for me. Now he runs off, with a half forgotten 'bye mum' and I have to go looking for him and wait for him to finish playing with his friends when I collect him.

He now chats all the time and his language pronunciation is so improved. He can hold a pencil and participate in art and craft. He has fun with groups of children. He is not scared of noise... He even loves getting his hair cut now, chatting to the hairdresser (he used to scream and cry)

His food tolerance has improved dramatically as well.

For my youngest daughter, her gains have been mainly seen through her food tolerance. She was already a confident and social little thing. Her diet is now unbelievable. I would never imagined when we started homeopathy that in just four months we would have such success.

Previously the children's diet was just
chicken, lamb, rice, tapioca/arrowroot, potato, celery, choko, Nuttelex, sunflower oil (meats cooked quickly with no browning)

Now they have
slow cooked meat, chicken broth, gelatin, ghee, tallow, coconut oil and flour, cucumber, carrot, sweet potato, capsicum, broccoli, peas, pumpkin, avocado, eggs, macadamia nuts, honey, pomegranate juice, banana, strawberry, kiwi fruit, blueberry, passionfruit, rockmelon... the list is continually growing.

Isn't that just amazing!


The Detox


Detox is hard work... your body is getting rid of years of bad stuff. Sometimes it passes quickly, other times, not so much. The more you relax and accept it, the easier it is to cope. For those of us used to food reactions, I found it very similar on occasion. The best bit being, you always get a gain.

For me, detox has been headaches, bloating, skin rashes, varying emotions - sad, angry, anxious, calm

For the little ones, detox has been much easier than I anticipated. There has been fevers, vomiting, bowel issues, sore bottoms, rashes, nose bleeds, irritating and cranky behaviour, sleep disturbances. I found that once I was calm and didn't panic, the children moved through each detox really quickly. And although that list sounds bad, they still played and went to school and coped with daily life. You receive remedies to help with the detox and they really do help so much.

Detox is very individual, so we will all go through something a bit different.


To give you an example of how well our healing is going... there was a terrible virus going through school last week. We caught it and had a fever overnight and that was it. Totally fine the next day. Other kids were off school a full week. Early this year when a similar virus was going around, I had both children in hospital on drips for a week.


The exciting thing about detox is waiting for the gain. After each detox, something really cool happens. Last detox, my son started creating with his Lego. Before he would just play with components already made. He now pulls them apart and makes his own. And he started saying "L".


The Homeopath


My wonderful Homeopath is Michelle Amor. She has been a constant support to me and has helped us achieve healing I never thought possible. You can contact her via email, mobile, website or her Facebook page  http://journeytoawareness.net/about/


Michelle Amor details


blowing kisses
Good luck from my little people to yours xo


Not all of us can heal with diet alone. It is very important to remember, you are all doing your best with the information you have. It is a difficult, frustrating journey, full of many twists and turns. Don't lose heart just because one aspect didn't work for you. We are all so very different and our journeys are different... we learn something new from each stage and I hope that one day you will all be able to share your success.
Be patient and kind to yourself while you heal


signature

Saturday, 31 August 2013

New Book - Grain Free


Kersten's Kitchen Grain Free Recipe Book


grain free book cover


I am very excited to be able to provide you with a simple collection of Grain Free recipes.

There are recipes for everyday staples, meals and baking
  • You will be using coconut flour, nut meals and seeds to create delicious treats
  • Healing broth will be the base for different easy to prepare meals
  • Probiotic fermented foods and drinks will surprise you

Recipes are free from gluten and refined sugar. Some do use nuts and egg, although you will find many recipes without. Most are dairy free, some use ghee.

Instructions are written for the Thermomix but can be adapted to use a food processor. Many recipes are very simple, using a bowl and your stove.


compilation image grain free book
Just a sample of the creations in 'Grain Free'


Please check out the table of contents to see what goodies you can prepare. The book is available in Printed format as well as an eBook for instant download.

Grab your copy today

Welcome to the world of healing... ENJOY!


Saturday, 24 August 2013

Sausage Rolls

Gluten free Pastry for Sausage Rolls


This is a simple pastry which is easy to handle and very flexible. It is able to be used to make sausage rolls, meat pies, savoury pasties and sweet fruit pies as well.


sausage rolls


The recipe can be found for traditional mixing or by hand in Kersten's Kitchen: Allergy Free, Not Flavour Free and for Thermomix in Thirty Second Baking.


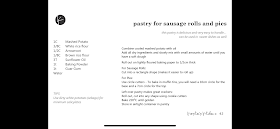
Pastry for sausage rolls and pies (traditional method)

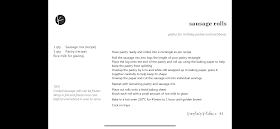
Sausage rolls method


Here are some step by step photos to help with preparing sausage rolls:

STEP ONE


Prepare the dough either by hand, in KitchenAid or Thermomix
(You can double the recipe if you want to make a big batch to freeze or for a party)

sausage roll pastry dough


Dough Tips: Mashed potato should be just a potato, boiled then mashed. Do not use TMX mash potato as it is way too runny. Consistency should be thick. Add water slowly and mix. The guar gum takes time to activate and if you add to much liquid you will end up with a sticky mess. Once the dough comes together, stop adding liquid and use your hands to knead. Add a little extra flour to your bench as above and knead to get your dough into a ball shape. If you grind your own flours they will not be as fine as store bought. You will need to add a little less liquid or more flour to compensate for the coarser texture. I find if you use store bought white rice flour and tapioca/arrowroot starch and only grind the brown rice texture will be fine. Dough should be soft and pliable, and very easy to handle and roll out. It will feel similar to playdough...

STEP TWO


Roll out half the dough until about 5mm thick adding extra flour to your rolling pin and surface so the dough doesn't stick
Cut into a rectangle shape

roll out pastry

STEP THREE


Roll sausage meat into a log and place on the long side of the rectangle of pastry


roll into log and add meat to pastry

STEP FOUR


Using the baking paper to help you, lift the pastry and roll over the top of the meat, lift the paper away from the pastry and continue rolling until the meat is enclosed and the pastry starts to over lap. Then cut away excess pastry.


use baking paper to help roll up

STEP FIVE


Cut into serving size and place on lined baking tray and brush with milk or egg to glaze

cut to size


STEP SIX


Repeat with remaining pastry and meat

repeat and place on baking tray


STEP SEVEN


Bake 180 degrees celcius for 40 - 50 minutes until golden


TIP: If you would like to freeze sausage rolls for later use, par bake for approx. 30 minutes and freeze portions. Reheat and complete cooking the pastry for 15-20 minutes


Monday, 12 August 2013

Update: Children's Healing Journey: Six months on...

UPDATE: My Children's Journey from Failsafe to healing...

my children


So it has been just over 6 months since making some big changes in diet for my little ones. You can read about the first changes here http://www.kerstenskitchen.com.au/2013/01/childrens-journey.html

Thought you may like to hear how they have been going... We introduced some healing foods and then added in vegetables and fruits as their tolerance grew. Remember they were on just a handful of foods before...


Coconut Oil

I continued using coconut oil in their cookies and cupcakes. We now add coconut flour too, there is very little rice flour. The quantity has increased from the initial tablespoon and they can eat unlimited quantities with no reaction.

Meat - ghee and coconut oil

Previously I cooked in sunflower oil and always baked their meat balls and any chicken in the oven very lightly so there was no browning at all. Now I fry their meat balls and chicken sticks in Ghee on the stove. I also bake with coconut oil. They now tolerate slow cooked lamb and chicken with no reaction.

Broth

Their tolerance for broth has also increased... instead of the 2 hour cooked broth, they are able to have long cooked chicken broth that has loads of healing gelatin.

Gelatin

We have been able to add Grass Fed Beef Gelatin from Great Lakes... we use it in sugar free marshmallows. This has been an exciting new food for them as it looks and tastes like a treat but is full of healing gelatin!


Fermented Veg

Every few days they have half a ml of fermented veg juice. It is a strong probiotic so I am still going slowly with this.

Kefir

Instead of increasing their food chemicals even more by using coconut kefir, I made some rice milk kefir. This now makes up their icecream (replacing the rice milk) as well as having 1 Tablespoon in their glass of rice milk each day. I started with 1/8 teaspoon and built up every few days. This is a strong probiotic so introduce slowly.

Vegetables

The healing foods have been amazing and the children's tolerance has improved so much. They now eat unlimited moderate salicylates... carrot, cucumber, sweet potato every day. I chose to introduce broccoli and avocado very early due to their nutrient profile and they can now eat both every day.

Fruit

This has been tricky... early on even tiny amounts of any fruit sent them crazy! With slow and steady perseverance I have added in small serves of banana (a slice once a week initially), they now have half a lady finger banana three times a week. My son is not keen on fruit, but my daughter is loving it and now eats strawberries, blueberries and kiwi fruit several times a week. 


Egg

Last month we challenged eggs. Previously they would get a lot of stomach pain and bleeding bowels when eaten. I bought chickens last year to see if I could tolerate their eggs as I was also sick when eating store bought eggs. That was a success for me, so I thought it was time, given how well they were doing, to try some egg. So far so good!! They are having egg cooked in cake every day now. We just tried scrambled egg on the weekend and that was fine too! yay!


Nuts

While trying to get my son to eat egg, I ended up challenging nuts. He was not liking his normal cake with an egg added... he was very upset with me and told me I had ruined his cake! No amount of telling him "that was what a good cake should be" was helping. At the time I was eating macadamia cake - lovely recipe which will be in my Grain Free Book avail soon - he really wanted some of MY cake. So I weakened and let them both have a small piece. I was very worried and watched them closely for hours, even when they fell asleep, checking for swelling, rashes etc. But to my delight (and theirs) NO reaction! So they now get to eat macadamia cake :)


The children have been so excited to try new foods and it has been a delight to watch their faces light up at all the new experiences.

 
I have been aiming to increase their chemical tolerance, so that I could decrease the grain component of their diet. I decided not to totally remove grains but limit them...


Here is a sample of a their meals before and now:


BEFORE


Breakfast

toast
rice puffs
rice milk smoothie
 

Morning tea

rice cupcake
rice cruskit and choko jam
chips
rice cookie
 

Lunch

lamb meat balls
celery sticks
potato hash
 

Dinner

chicken schnitzel
hot chips
choko sticks


NOW


Breakfast

lamb meatballs cooked in ghee
rice toast with avocado
rice milk kefir smoothie
 

Morning tea

macadamia cake
banana or berries
 

Lunch

chicken skewers cooked in ghee
cucumber
potato fritters
 

Dinner

slow cooked lamb
roast sweet potato
carrot
broccoli
 
And they can have rice kefir icecream if they want for dessert.
 
I cannot believe this has been achieved in just 6 months of slowly adding in healing foods. Credit is not only in food as medicine, but also from Homeopathy. We started Aperture Homeopathy with Dhanvantari College of Homeopathy in April. It has made such a huge impact on our lives. 


Jump into healing people!!! It is worth the ride... If you need some ideas to get you started as well as some recipes, check out my Failsafe to Healing Workbook


Saturday, 10 August 2013

Pizza

Gluten Free Pizza bases


gluten free pizza


You can use any of my bread recipes but I prefer to use the Guar Gum recipe.

The recipe in all the books:

Rice based using Stand Mixer is in the first book, Kersten's Kitchen
Rice based using Thermomix is in Thirty Second Baking
Grain free using Buckwheat and Millet (can use Quinoa if you prefer) is in Failsafe to Healing Workbook

Guar Gum Bread Recipe (traditional method)

how to proof yeast and bread dough

If you need some help when preparing the dough, please refer to http://www.kerstenskitchen.com.au/2012/07/technique-bread-making-with-yeast.html


Step One


Once you have prepared the dough, using very wet hands, place into a greased baking dish. You can use a large rectangular lamington tray or if you want circles, use a cake tin

pizza dough


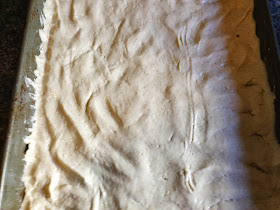
With your wet fingers, press out the dough until thin - you will be able to make more than one pizza with one quantity of dough. It will double in size after rising, so you want it to be half the thickness of what you want your pizza to be. I like a thin crust, so I make it very thin at this stage

pizza dough - spread out thin


Step Two


Put in your warm place to rise (that you prepared earlier when making the dough - see http://www.kerstenskitchen.com.au/2012/07/technique-bread-making-with-yeast.html for assistance)
Leave till doubled, about 10 minutes

pizza dough - leave to rise

Step Three


If you are not using your base right now,
Partially cook - 15 minutes should be sufficient. It will still be soft on top, but set so you can remove it carefully from the tin.

pizza base - cut to size


Leave to cool on a baking rack until cold.
Cut to portion size and freeze in snap lock bags to use later

pizza base - freeze in portions in snap lock bags


If you are using your base now,
Remove from warm place, cover with your desired toppings

pizza toppings

Step Four


Bake - 180 degrees Celsius for approx. 20 - 30 minutes until golden and filling is cooked


Enjoy!

Monday, 8 July 2013

Marshmallow (refined sugar free)

Yummy squishy marshmallow


can be eaten as is, or used as icing for cupcakes, or used to sandwich cookies together, or dropped into hot chocolate


marshmallow types


Ingredients


1C water
1C rice malt syrup (failsafe) or honey (grainfree/GAPS)
1t vanilla extract
pinch salt
3T gelatin*


Method


marshmallow method


Place 1/2C water in TMX bowl with butterfly inserted
Sprinkle gelatin over the water
Mix speed 2 for 30 seconds to combine
Leave to rest

Place 1/2C water, rice malt syrup or honey, salt and vanilla in small pot
Bring to the boil and then reduce heat slightly
Using a thermometer, continue boiling until syrup reaches soft crack stage, approx. 130-140 degrees
(if using Rice Malt Syrup - only go to 125 degrees)
Remove from heat

Turn on TMX, speed 2 and slowly add boiling syrup (this should take about 40sec)
Now slowly increase the speed to 4 (take about 20sec)
Continue to whip at speed 4 for 3 minutes
(if using for icing, whip for just 2 minutes... gives you some extra time before it sets)

Marshmallow is now ready to use... remove butterfly
 
NOTE: If you do not have a Thermomix (TMX), use a stand mixer to whip the marshmallow.
Usually takes about 10 minutes.


for cubes

Scoop out mixture into a lined dish and leave to set in the fridge for a few hours

When set, lift out marshmallow (using baking paper you lined dish with) and cut with a sharp wet knife into small squares

Roll in desiccated coconut (you can toast** if you like) or roll in tapioca starch (dust most off). This will stop them from sticking together.

Store in a snaplock bag or Tupperware container in the fridge.

for icing

Working quickly as marshmallow will start setting quickly, spoon small amounts onto cupcakes or fill a piping bag and pipe on

You can use vanilla cupcakes from both my cookbooks, or use coconut rice cupcake from Failsafe to Healing Workbook
for biscuit sandwiches

Working quickly as marshmallow will start setting quickly, spoon small amounts onto the underside of cookie, place another cookie on top and press lightly

You can use the vanilla cookies from both my cookbooks or use the coconut rice cookie from Failsafe to Healing Workbook


*gelatin - Make sure you use a good quality gelatin. We use GREAT LAKES brand, which you can purchase from Island Organics. See supplier page for contact details

**toasted coconut - to toast coconut, place desiccated coconut into a dry frypan, cook over moderate heat, stirring, until coconut is golden... remove from pan. Store in an airtight container or snap lock bag.